
If you’ve ever worked on a software project with a team, you know Git stopped being “just a technical detail” a long time ago - it’s part of how you think through your day-to-day work. Understanding how and when to use each command is what separates people who just “survive” Git from people who actually flow with it.
In this article I want to go beyond the basics (init, add, commit, push) and walk through the workflow I actually use day to day, including feature branches, rebase, and the most common error fixes that show up in real work.
What you’ll see
- Initial setup and the three states of Git
- How to structure work with feature branches
- Merge vs Rebase: when to use each one
- How to resolve conflicts without panicking
- How to undo and fix mistakes:
amend,reset,revert,stash - Best practices to make team collaboration smoother
Initial Git setup
Before anything else, set your name and email - they get recorded in every commit you make:
git config --global user.name "Your Name"
git config --global user.email "[email protected]"A few settings I recommend from day one:
# sets "main" as the default branch name for new repos
git config --global init.defaultBranch main

# default editor for commit messages and interactive rebase
git config --global core.editor "nvim"

# avoids a silent fast-forward on pulls (keeps history cleaner)
git config --global pull.rebase trueTo start a new repository:
git initOr, to work on an existing project:
git clone [email protected]:user/repository.gitThe three states of Git
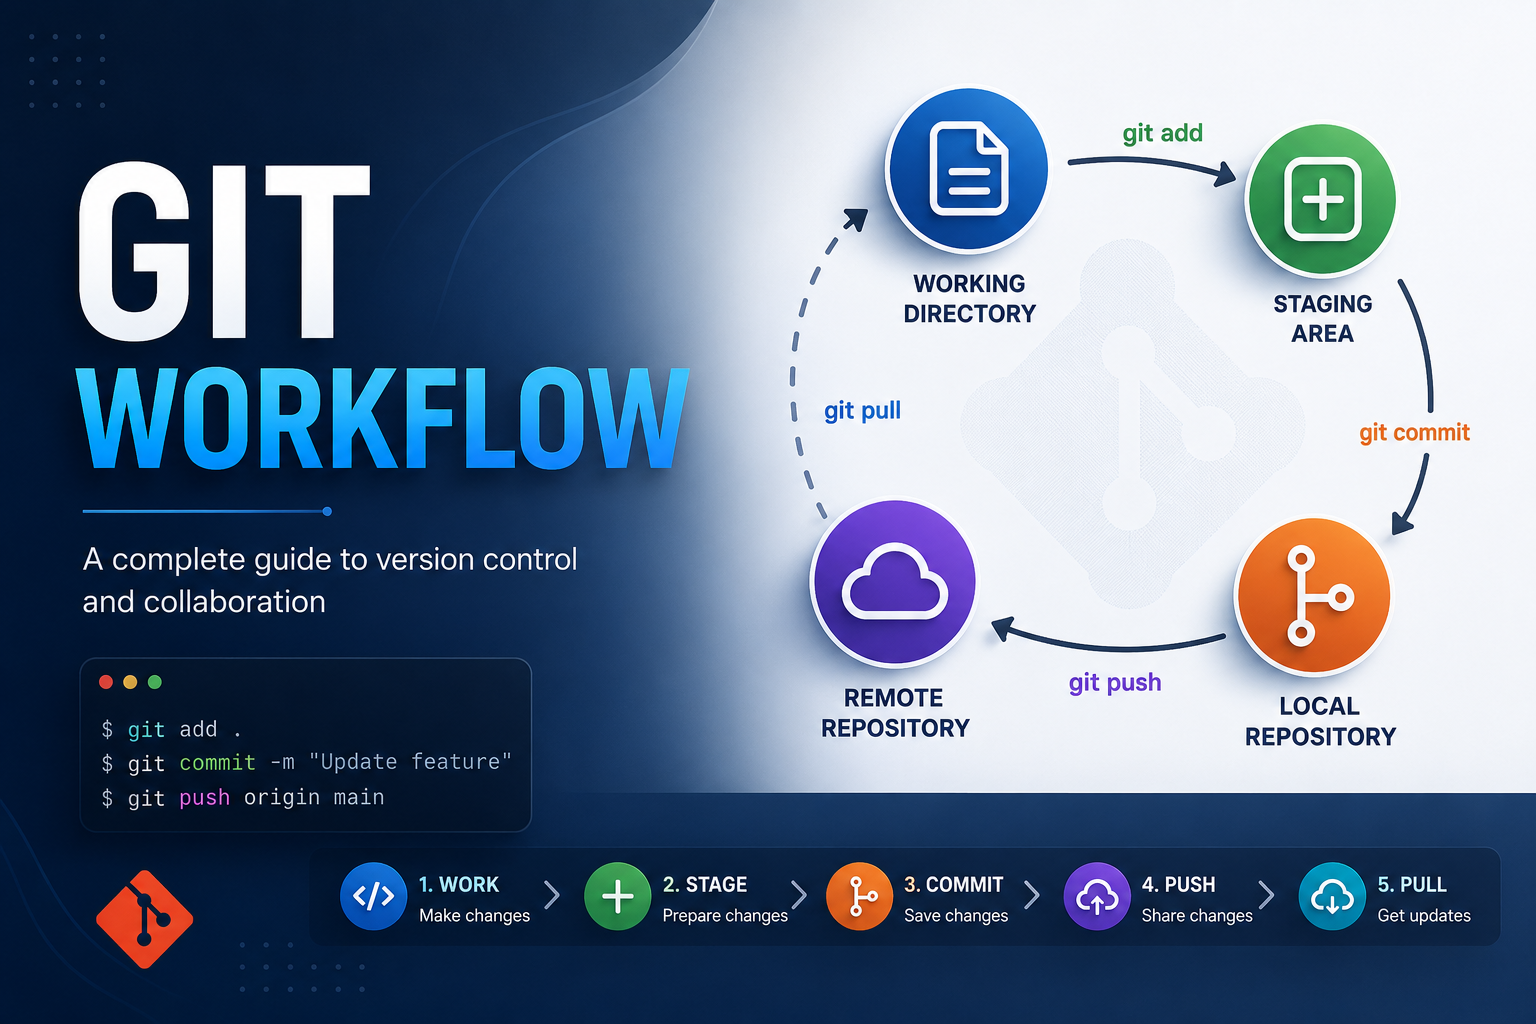
Git organizes your local work into three areas:
- Working Directory - the files as they currently sit on your disk.
- Staging Area (Index) - an intermediate area holding what will go into the next commit.
- Repository (HEAD) - the history of commits already recorded.
Visually, the flow between these areas looks like this:
Working Directory        Staging Area (Index)         Repository (HEAD)
------------------        ---------------------         ------------------
 file.py (edited)     --git add-->  file.py      --git commit-->   o---o---o
                                     (ready to                              ^
                                      commit)                             HEAD

        <---------------------- git reset ----------------------------------
<----------------------------- git restore --------------------------git addmoves things from the Working Directory to Staging.git commitmoves things from Staging to the Repository.git resetandgit restorego the other way, each with a different scope (you’ll see this in the error-fixing section below).
# check the current state of your files
git status

# stage a specific file
git add path/to/file.py

# stage everything that was modified
git add .

# create a commit with what's currently staged
git commit -m "feat: add CPF validation to the form"A good practice here is writing commit messages following the Conventional Commits
pattern (feat:, fix:, refactor:, docs:, chore:…). It makes it much easier to generate an automatic changelog and quickly understand the history later.
Feature Branch: isolating your work
The main branch (or master, in older projects) should always represent stable code, ready to go to production. That’s why we never work directly on it.
The feature branch workflow means creating an isolated branch for each feature, bug fix, or experiment:
# creates and switches to the new branch
git checkout -b feature/google-login

# more modern equivalent of checkout -b
git switch -c feature/google-loginSome common naming conventions:
feature/feature-namefix/bug-namehotfix/urgent-production-fixchore/update-dependencies
Working this way gives you a few important advantages:
- You can make mistakes, test things, and rewrite commits without touching
main. - It’s easy to open a focused Pull Request for review.
- Multiple developers can work in parallel without stepping on each other’s toes.
- If something goes very wrong, you can simply discard the branch.
Visually, the history looks like this while the feature is in progress:
main       o---o---o---------------------o---o---o
                    \
feature/login        o---o---o---o
                      (isolated commits,
main is untouched)While you work on your feature, main keeps receiving other merges. That’s why it’s important to keep your branch up to date - and this is where merge and rebase come in.
Merge vs Rebase
Both commands solve the same problem - bringing changes from one branch into another - but in different ways, and that difference matters quite a lot for your project’s history.
git merge
Merge creates a new merge commit that joins the two histories together:
git checkout main
git pull origin main

git checkout feature/google-login
git merge mainAdvantages: it preserves history exactly as it happened, it’s safer for shared branches, and it never rewrites commits that have already been pushed.
Disadvantage: history can get “noisy” with lots of merge commits, especially in projects with many short-lived branches.
Before the merge:

main       o---o---o
                    \
feature              o---o---o

After the merge (new merge commit "M"):

main       o---o---o-------------M
                    \            /
feature o---o---o--/git rebase
Rebase replays your branch’s commits on top of the latest state of the base branch, as if you had started your work from that more recent point:
git checkout feature/google-login
git fetch origin
git rebase origin/mainThe result is a linear history, with no extra merge commits - as if the whole feature had been developed from scratch on top of the newest main.
Before the rebase:

main       o---o---o---o        <- main moved forward with new commits
                    \
feature              o---o---o  <- your old commits

After "git rebase origin/main":

main       o---o---o---o
                        \
feature                  o'---o'---o'   <- your commits, replayed
(new hashes!)⚠️ The golden rule of rebase: never rebase a branch that has already been shared with other people (e.g.
main,develop) and already pushed. Rebase rewrites history (new commit hashes), which breaks things for anyone who already pulled the old commits. Use rebase freely on your own feature branch, before opening the PR, or while you’re the only one working on it.
Interactive rebase: cleaning up history
Before opening a Pull Request, it’s common to “clean up” your commit sequence with an interactive rebase:
git rebase -i HEAD~5This opens an editor where, for each of the last 5 commits, you can:
pick- keep the commit as isreword- keep the changes, but edit the messagesquashorfixup- combine the commit with the previous onedrop- discard the commit
It’s great for turning a bunch of “wip”, “tweak”, “fix typo” commits into a clean, understandable history before sending it out for review.
When should you use each one?
| Situation | Recommendation |
|---|---|
Updating your local feature branch with main | rebase |
Bringing a finished feature into main via Pull Request | merge (usually done through the GitHub/GitLab UI) |
| A branch already shared with the team | merge (never rebase) |
| Cleaning up commits before opening a PR | rebase -i |
Resolving conflicts
Conflicts happen when Git can’t decide on its own how to combine two changes made to the same line of code. Both merge and rebase can produce conflicts - the difference is how you resolve them.
A practical example
Say that on main, someone changed the discount function:
# main
def calculate_discount(amount):
return amount * 0.9 # 10% discountAnd on your feature/special-discount branch, you changed the very same line:
# feature/special-discount
def calculate_discount(amount):
return amount * 0.85 # 15% discountRunning git merge main (or git rebase origin/main), Git doesn’t know which version to keep, so it flags the file as conflicted:
$ git merge main
Auto-merging app.py
CONFLICT (content): Merge conflict in app.py
Automatic merge failed; fix conflicts and then commit the result.Opening app.py, you’ll see the conflict markers:
def calculate_discount(amount):
<<<<<<< HEAD
    return amount * 0.9  # 10% discount
=======
    return amount * 0.85  # 15% discount
>>>>>>> feature/special-discount- Everything between
<<<<<<< HEADand=======is the version from the branch you’re currently on. - Everything between
=======and>>>>>>> feature/...is the version being brought in.
You resolve it by manually editing to the result you want (here, deciding to keep the 15%) and removing the markers:
def calculate_discount(amount):
return amount * 0.85 # 15% discount (sales team's decision)Then you finish the process:
# during a merge with conflicts
git status                    # shows the files in conflict
git add app.py                # marks the conflict as resolved
git commit                    # finishes the merge

# during a rebase with conflicts
git status
git add app.py
git rebase --continue          # continues the rebase, DO NOT use "git commit"

# to abort and return to the state before the conflict
git merge --abort
git rebase --abortResolving fast, keeping one side entirely
If you already know you want to keep one version entirely, without mixing anything, you can skip manual editing:
# keeps the version from your current branch
git checkout --ours app.py

# keeps the version being brought in
git checkout --theirs app.py

git add app.py
git commit # or git rebase --continue⚠️ Careful with rebase: during a
rebase, the meaning of--oursand--theirsis flipped compared to a merge, because Git is replaying your commits on top of the other branch. When in doubt, always check the file’s actual content before committing - don’t rely on the flag name alone.
Tip: don’t be afraid to run git rebase --abort if things get out of hand - it puts you right back to the exact state before the rebase started.
Git Worktree: a complement (not a replacement) for feature branches
A common misconception is thinking git worktree is “another way to create feature branches.” Actually, they’re different things that solve different problems:
- Feature branch is a concept from Git’s history model: a reference pointing to an isolated sequence of commits.
- Worktree is a mechanism that lets you have more than one working directory checked out to different branches at the same time, all sharing the same
.gitrepository (same objects, same history, same branches).
In other words: you keep using feature branches normally - worktree just changes where and how you access each of them on disk.
The problem worktree solves
Without worktree, if you’re in the middle of a feature (with uncommitted changes) and need to handle an urgent hotfix, the typical flow is:
git stash                      # stashes your work in progress
git switch main
git switch -c hotfix/fix-login
# ... fix the hotfix, commit, push ...
git switch feature/new-feature
git stash pop # brings your work backIt works, but it’s a risky back-and-forth - especially if you have generated files, running servers, or tests in progress that depend on the current state of the files.
With git worktree, you create an additional folder pointing to another branch, without touching your current working directory at all:
# creates a new worktree at ../my-app-hotfix, on branch hotfix/fix-login
git worktree add ../my-app-hotfix -b hotfix/fix-login main

# lists the active worktrees
git worktree list

# removes the worktree once you no longer need it
git worktree remove ../my-app-hotfixNow you have two folders, each with its own working directory and independent checkout, but sharing the exact same commit history:
~/projects/my-app              (branch: feature/new-feature)
~/projects/my-app-hotfix       (branch: hotfix/fix-login)

same .git repository behind both of themFeature branch vs Worktree
| Aspect | Feature Branch | Git Worktree |
|---|---|---|
| What it is | An isolated line of commits within the history | An extra working directory, linked to the same repository |
| Switching context | git switch/checkout swaps the files in the same folder | Just open another folder/terminal - nothing changes in the current one |
Need stash? | Yes, if there are uncommitted changes | No - each worktree keeps its own state |
| Typical use | Isolating the development of one feature | Working on two branches at the same time (e.g. urgent hotfix + feature in progress), running tests in parallel, or reviewing a PR without leaving your current branch |
| Replaces the other? | No | No - they complement each other |
In practice: you’ll keep creating a feature branch for every feature; worktree is just an extra tool for when you need to physically be on two branches at once, without the cost of cloning the whole repository again.
Fixing common mistakes
Here are the “lifesavers” I reach for most often in day-to-day work.
I forgot to include a file in my last commit
git add forgotten-file.py
git commit --amend --no-editI want to change the message of my last commit
git commit --amend -m "fix: correct previous message"⚠️
--amendrewrites the commit (new hash). Only use it on commits that haven’t been pushed yet, or on branches that are only yours.
I committed to the wrong branch
# undoes the commit but keeps the changes in the working directory
git reset --soft HEAD~1

# switch to the correct branch
git switch correct-branch-name

# redo the commit there
git commit -m "feat: my change on the right branch"I need to undo the last commit
# keeps the changes staged
git reset --soft HEAD~1

# keeps the changes in the working directory (unstaged)
git reset --mixed HEAD~1

# discards the changes completely (be careful, this is destructive!)
git reset --hard HEAD~1I already pushed the wrong commit and others have already pulled that history
In this case, don’t use reset (it rewrites history). Use revert, which creates a new commit undoing the changes without erasing history:
git revert <commit-hash>I want to discard uncommitted changes in a file
# modern way
git restore file.py

# older way, still widely used
git checkout -- file.pyI need to switch branches, but I have changes halfway done
git stash                     # temporarily saves the changes
git switch other-branch
# ... do what you need to do ...
git switch original-branch
git stash pop # brings the changes backI already pushed, but I need to fix the history of my own feature branch
git push --force-with-lease origin feature/google-login
--force-with-leaseis safer than a plain--force: it fails if someone else has pushed commits to the remote branch since your last update, preventing you from accidentally overwriting someone else’s work.
Updating the remote repository
# fetches remote references without touching your local branch
git fetch origin

# fetches and integrates them right away (merge or rebase, depending on config)
git pull origin main

# pushes your branch to the remote
git push origin feature/google-loginA full workflow, start to finish
- Update your local
main:git checkout main && git pull - Create your feature branch:
git switch -c feature/new-feature - Work in small commits with clear messages
- Before opening the PR, update from main:
git fetch && git rebase origin/main - If needed, clean up the history:
git rebase -i HEAD~N - Push it:
git push -u origin feature/new-feature - Open the Pull Request and ask for a review
- Once approved, merge it (usually squash and merge or a merge commit, depending on your team’s convention)
- Delete the local and remote branch after the merge
Wrapping up
Mastering Git’s basic workflow (init, add, commit, push) is the first step, but what really changes your productivity on a team is understanding feature branches, knowing when to choose merge vs rebase, and having the confidence to fix your own mistakes without panicking.
With these commands in your toolkit, you stop being afraid of Git and start using it for what it really is: a powerful tool for working safely as a team.
Got a question about any of these commands? Drop it in the comments - I’d love to help!